Friday, September 14, 2012

Chicken Plov (Pilaf)

I'm back! After a long break, I think I will finally start posting about my simply culinary adventures. Yay! And we'll celebrate my return by this easy-breezy, absolutely delicious plov. Or pilaf. Now, make no mistakes. This is not a traditional, cooked on a fire, in a dutch over, plov. But it's still pretty darn good! I finally wrote the recipe down. And so I hope you'll enjoy it. Приятного аппетита!


Easy Chicken Plov


1.5 lbs boneless skinless chicken, diced
4 cups medium grain rice
6 cups water
2.5 carrots, chopped
½ cup white or yellow onion, chopped
1/8 cup vegetable oil
1 tsp salt
1 tsp plov seasoning
½ tsp paprika
¾ tsp garlic powder


1. In a large pot heat the oil. Add chicken and brown slightly. Add carrot and onion. Add salt, ½ tsp plov seasoning and ½ tsp garlic powder. Saute 5-7 minutes.

2. Add rice. Level it with a spatula. Carefully add water, without mixing the ingredients. Add the other ½ tsp plov seasoning and ¼ tsp garlic powder. Again, don't stir.

3. Cover the pot with a lid. Bring to a boil and then immediately reduce the flame to very low. Cook for 17-20 minutes, or until rice is tender and water is evaporated.

4. Serve hot with your favorite condiments, or as is!


Notes: You can substitute chicken for pork or lamb. Whichever you prefer.


Monday, August 8, 2011

Quick Pizza

Yes, pizza is not a Russian dish, and yet everyone loves it! It's simply a variation on the Russian pies - open faced bready goody full of deliciousness! So here comes this easy beauty - the 5 minute pita pizza. There are no requirements on toppings, you can throw on anything you can find in your fridge - from cheese only and up to BBQ sauce and chicken. You choose!


Quick Pita Pizza with Tomatoes, Pepperoni and Spinach

Servings: 1

1 8-inch pita
2 tsp olive oil
5 small rounds of pepperoni
5 slices of ripe tomato
Handful of grated mozzarella
Dried garlic
Fresh spinach leaves


1.       Preheat the oven or turn on the broiler on high.
2.       Brush the pita with olive oil and gently sprinkle with dried garlic.
3.       Sprinkle the pita with half the handful of cheese.
4.       Top with pepperoni, tomatoes, spinach leaves and the rest of the cheese.
5.       Put pizza in the over or under the broiler and let cheese melt and brown nicely. Make sure the sides of your pizza don’t burn. Done!

Wednesday, August 3, 2011

Apricot Charlotte (Sharlotka s Abrikosami)

I have absolutely no idea where the name "Charlotte" came from but it's basically a cake. I have seen non-Russian recipes for the dish and they don't look the same for the name...


Our neighbors gave us a bunch of apricots, and other than making jam (which I did), I also decided to make some baked goody, to please my ever whining sweet tooth. The recipe is easy and actually comes from my mom. I think I made it enough times now to just remember, but here goes!

The sweeter the fruit, the  better, although it's good with slightly tart specimens too. Also try it with apples, pears, plums, currant or gooseberries. With this kind of dough anything goes!


Apricot Charlotte

Servings: 8-12


2 eggs
1 cup buttermilk
1 stick butter
½ tsp baking soda
1 cup sugar
1 cup flour (heaping generously)
16 small ripe apricots
Cinnamon


1.       Wash apricots, cut in half and remove pits.
2.       Preheat the oven to 350F.
3.       Melt butter. Add sugar, eggs and buttermilk. Mix well with a hand mixer.
4.       Add flour and baking soda. Mix well, leaving no lumps.
5.       Grease a 9x13 baking pan (Pam or butter with flour dusting). Pour the dough and smooth it evenly over the pan (a spatula or a generous shake from side to side may help).
6.       Sprinkle with cinnamon and evenly layer the top with apricots.
7.       Bake 35-40 minutes or until golden brown and a toothpick comes out dry when inserted.


Tuesday, August 2, 2011

Holodnik (Cold Beet Soup)

While browsing isles at the grocery store have you ever wondered what on Earth could you use those canned beets for? There is at least one thing they’re good for (other than a late night snack, of course)! Please welcome Holodnik. It is a delicious summer soup, divinely designed for those impossible hot days that seem to plague us all this time of year. Holodnik literally translates as “cold soup” and can be traced in cuisines of many Slavic countries. It is basically a cold Borsch, and Russians often add potatoes and meat, although it is a traditionally meatless dish.

Even though this is my own recipe, it is probably not very much different from any other traditional Holodnik. Eat up, it’s mostly vegetables!


Quick Holodnik (Cold Beet Soup)

Servings: 6

1 can canned beets (15 oz./425 g)
1 medium cucumber
4 medium radishes (1 inch in diameter)
1 small bunch of green onion
1 small bunch of fresh dill (or 1½ tbsp dry)
3 boiled eggs
3 cups water (chilled)
1½ tsp salt
1½ tbsp white vinegar
Sour cream
Rye bread

1.       Open beets, drain juice into a medium bowl. Grate the beets on a large shredder, add to the juice.
2.       Add water, salt and vinegar to the bowl with the beets. Stir, set aside.
3.       Peel the cucumber, remove seeds. Grate, set aside.
4.       Clean radishes, remove tops and bottoms. Grate, set aside.
5.       Nicely chop green onions and dill.
6.       Add cucumber, radishes and greens to the beets. Stir well.
7.       Pour into bowls and top with a half of a sliced boiled egg.

Serve with sour cream and delicious rye bread.

Tuesday, July 19, 2011

Lazy Varenniki (Ленивые Варенники)

Here’s our family favorite! Very easy and quite quick, this recipe is referred in our household as “lazy varenniki”. Varenniki is a traditionally Ukrainian dish and is a sort of dumplings that can be stuffed with pretty much anything but meat – pickled cabbage, strawberries, cherries and more commonly potatoes. I remember my mom making this dish quite often as I was a kid, and now that I am married and have my own cooking duties and a wish for variety, this recipe came to mind. Again, very easy and delicious!


Cottage Cheese “Lazy” Varenniki (aka Lenivye Varenniki)

Servings: 4

3 cups all-purpose flour + extra for kneading
8 oz. small curd cottage cheese (regular or low fat – both work)
1 tsp salt + 1 tsbp salt (for boiling)
1 egg
¾ cup water
1 tbsp butter
Sour cream
Favorite jam or preserves


1.       Combine flour, water, salt, egg and cottage cheese in a bowl and make smooth dough. It may be a bit sticky but that’s why the recipe calls for extra flour – to help during kneading and shaping.
2.       Put sufficient amount of flour on your working surface and pull the dough out of the bowl. Knead a few minutes then cut into “strips”.
3.       Take one strip of dough at a time and shape “sausages” (¾ inch in diameter) by pressing the dough between your hands and rubbing your hands together.
4.       Cut “sausages” into ½ inch wide chunks, dunk them in flour and gently press on the cut side to make ovals or circles. Put aside on flour dusted surface.
5.       Boil 2 quarts of water with 1 tbsp of salt.
6.       Boil the dumplings in batches. Stir as soon as you put them in. Then let them float up and cook for 3-4 minutes.
7.       Using slotted spoon remove the dumplings into a bowl with 1 tbsp butter, stir and cover.

When you add additional batches into the bowl with butter, stir them all together to prevent sticking.

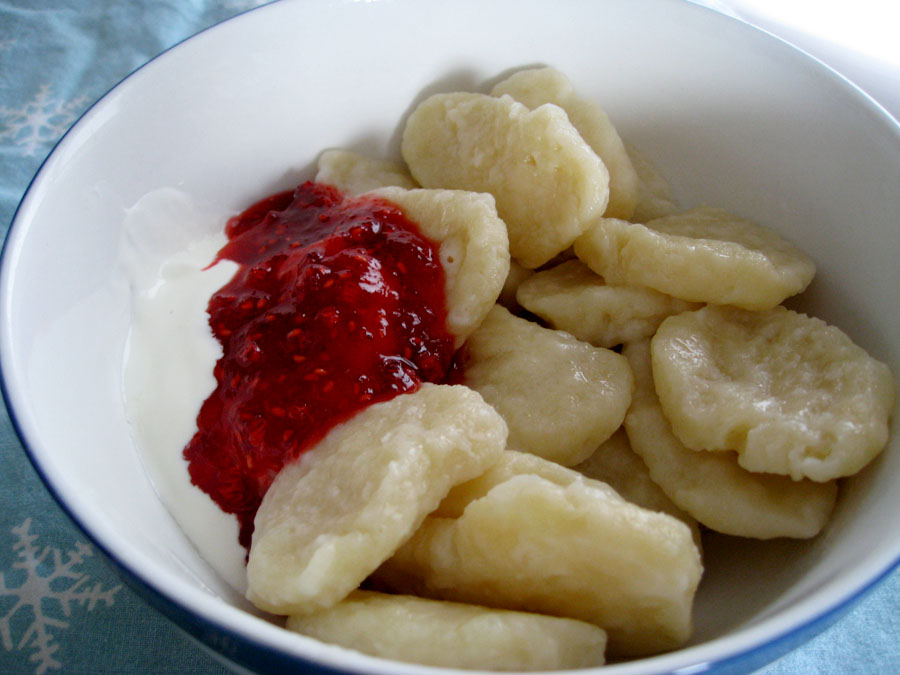
Serve hot or warm with sour cream and your favorite jam or preserves. Fresh pureed fruit, or butter and cinnamon and sugar are also great dressings for this dish.

Wednesday, June 1, 2011

Big Apple Pie

Russians love pies as much, if not more, as Americans do. The only difference is, well, the actual pies. We make them with a variety of fillings and go from tiny deep fried "pirozhki" to big and baked "pirogi".

This one is definitely a "pirog" - big and baked. The dough used in this recipe is your basic sweet bread dough used not only for pies but for a variety of other pastries. See the recipe for that dough in the previous post.


Today I thought to try a traditional apple pie. With a tiny twist of my own.

Apple Pie Filling

5 large apples (you pick Granny Smith or Gala)
1/2 cup sugar
1/2 lime - juiced
1 tbsp cinnamon + extra 5 tbps of sugar

1. Wash and peel the apples. Cut them in halves, remove the cores. Then slice thinly.


2. Put all your sliced apples in a large bowl, add sugar and juice of the lime. Lemon works too. But lime gives it an "out of the beaten path" tang. Gently mix with your hands. Try to break as few slices as possible. Put the apples in the sauce pan with some butter or just like that and saute them a bit if you worry that they won't come out soft after baking. There's always a risk!


3. Butter a cookie sheet. Roll half of the dough and fit it onto your cookie sheet. You will need an edge for this pie, so roll accordingly. Moderately butter your crust and then layer apples generously.


4. Sprinkle with the cinnamon and sugar mixture. You can leave it as is, or put some thin stripes of dough on top for decoration. It's up to you! But before you put our pie in the oven, brush the peeking crust with some whipped egg - for a shiny effect.

5. Preheat the oven to 350F. Bake for 25-35 minutes or until the crust is nice and golden brown and the apples are soft. Cover edges with foil if they start to brown too fast.


You can put the remaining dough in the fridge for a couple of days for future use or make some tiny rolls right away. But if you do the stripes, like in my pictures, there won't be as much left. However, 1 more apple can provide for a tiny version of this and you can share with someone special!

Basic Sweet Dough aka "Testo Sdobnoe"

The dough presented in this recipe is your basic sweet bread dough aka "sdobnoe testo" used not only for pies but for a variety of other pastries. If you're not up for pies use it for cinnamon and butter rolls, or anything else that comes to mind.

A piece of advice - sift the flour! I cannot stress enough how good a thing it is for your dough! So sift it! Twice!

The Recipe

2 cups milk
2 tbsp yeast
2 eggs
2 tsp salt
1 cup sugar
1 tbsp vanilla sugar (or vanilla extract)
9 cups flour depending on consistency + extra for kneading and rolling
2 sticks butter + 1/2 stick butter for greasing the pan and prepping the crust

1. Dissolve yeast in warm milk.
2. Add eggs, salt, sugar, vanilla and melted butter. Mix well.
3. Gradually add flour and knead the dough until it's nice and smooth.
4. Cover the bowl with the dough with a towel and put it in a warm place. Let sit for 30-45 minutes.

One trick that I learned from my sister-in-law is to preheat the oven to 170-200F. Turn it off. Put the bowl with the dough in. And here's a perfectly warm place. Plus, this is exactly why it only takes 30 minutes for it to be ready to use.

Once the dough is ready, knead it one more time. Then go ahead and shape your rolls or pies.

This dough bakes fast.
For smaller sized rolls and pies preheat the oven to 385F and bake 10-15 minutes or until golden brown.
Larger sized pies and breads will take longer. Try it at 350F for 15-20 minutes or until golden brown.

Make sure it doesn't burn on the bottom! Good luck!

Commentaries welcome.